|
Bushcraft
eBooks by Jon Ridgeon
CLICK HERE
|

|
“What is my dream?”, I
asked myself that question several years ago. My
answer was: To live in a beautiful place with
nature surrounding me (I visualised a cabin in
the forest), and through a combination of
‘hunter gatherer’ skills and vegetable growing,
I dreamt of being as self-sufficient as
possible.
Of course, the dream was all about what I like
and find interesting most of all. Basically,
I was dreaming about being true to myself, to
follow what I REALLY WANTED. Not some
‘second best prize’ of a job that didn’t totally
fit the bill.
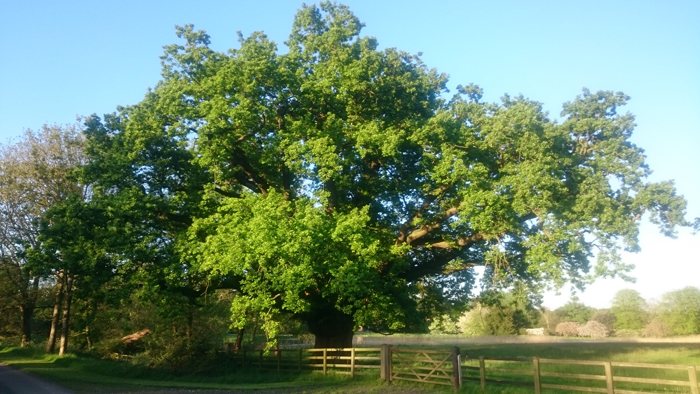
Now then, near my past home in the UK, there is
a big old oak tree that stands in beautiful
parkland. That tree is so old and wise; you can
feel its presence. On one of my daily walks,
thinking deep about life, incidentally passing
by the oak tree, I realised how precious and
important my dreams were, “I must NEVER forget
them” I thought. So I held a branch of the tree
and asked it to remind me to always be true
to myself, and make sure I never forget!
This was my way of ensuring that what was so
precious to me would never be forgotten, and
when making choices in life about opportunities
and ‘whatever’, the tree which I passed just
about every day would remind me. And the tree
did remind me… In a way, the tree became a
living symbol for what is truly important for me
in life.
From then on, it was too hard to betray my
dreams; I couldn’t go back on what the wise old
oak was whispering back to me. I was going to
peruse what I wanted and never give in…
So with my dreams set in stone, this was to
influence all the twists and turns and decision
making of my life in the proceeding years. One
thing I have come to realise is that once a
decision like this is made and you visualise it,
and want it without doubt, then the channels of
the universe will align to make your dream
happen. It sounds crazy, but this has been
confirmed to me many times now.
So after a lot of ‘stuff’ happening since
dreaming that dream, guess where I am now,
writing this blog post… I’m sitting in my cabin
in Norway, surrounded by forest and beautiful
nature; mountains; lakes; bird song; and a river
running by. I’m just about to head outside and
cook dinner on the campfire, eating fish I
caught in the lake, wild greens I foraged, and
vegetables I have grown. So, you dream a dream,
make a concrete decision that it’s what you
want, and then act. Do this and your reality
WILL transform. Great gifts await…
I
hope this inspires you to dream too.
|
 |
|
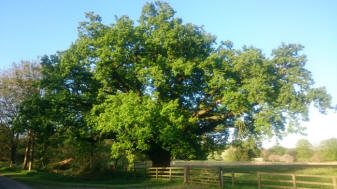
The wise old oak |
|
|
|
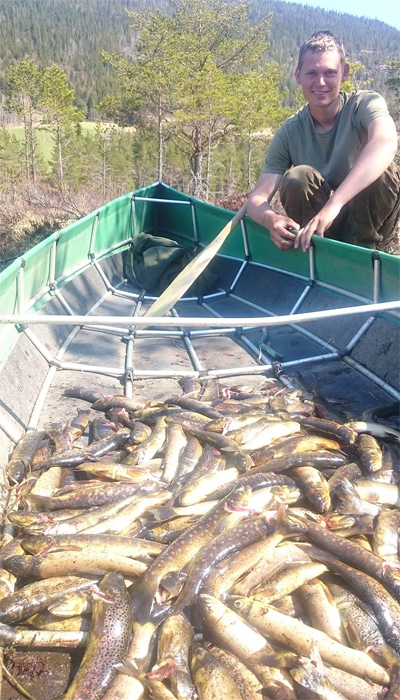
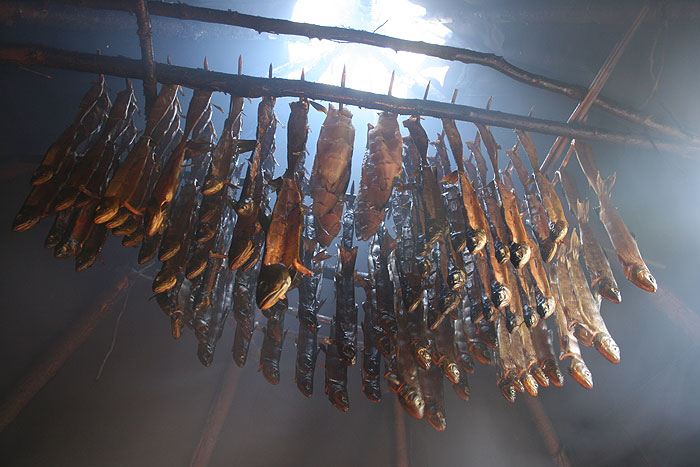
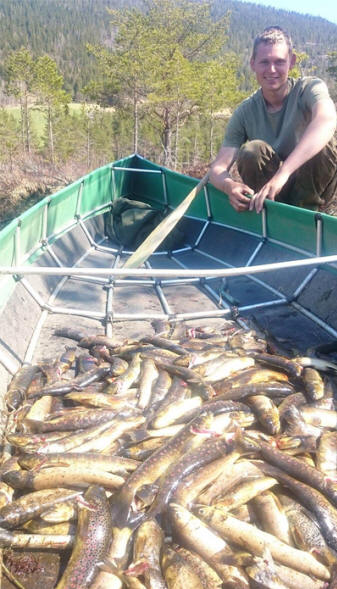
Spring time this
year. Caught these trout with my friend
Torjus Gaaren. Note, it is perfectly
healthy and even beneficial for the fish
population to catch this many fish in
my area. Fish were shared with the
local community. |
| |
 |
|
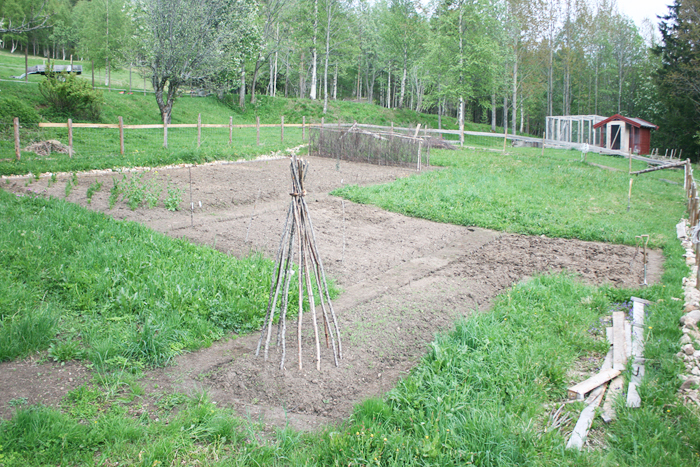
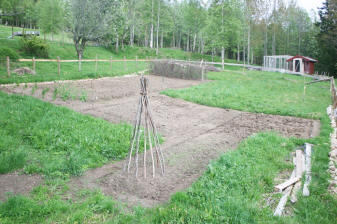
My prepared veg
patch this spring. On a friend's land;
there are always options to get what you
need... |
| |
|
|
|
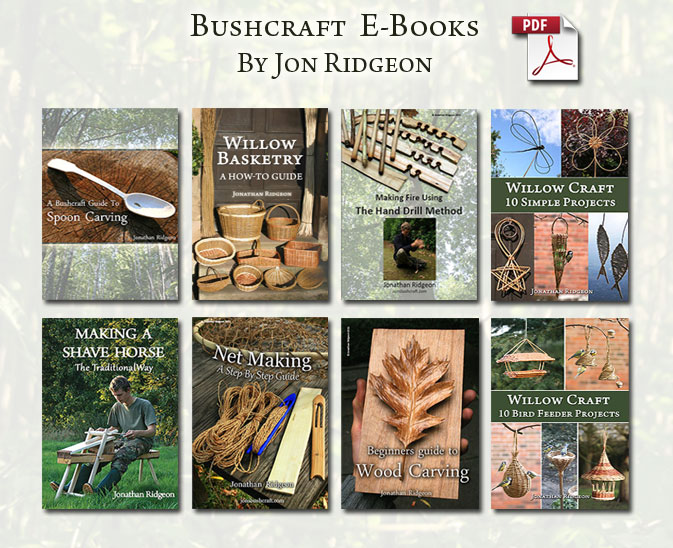
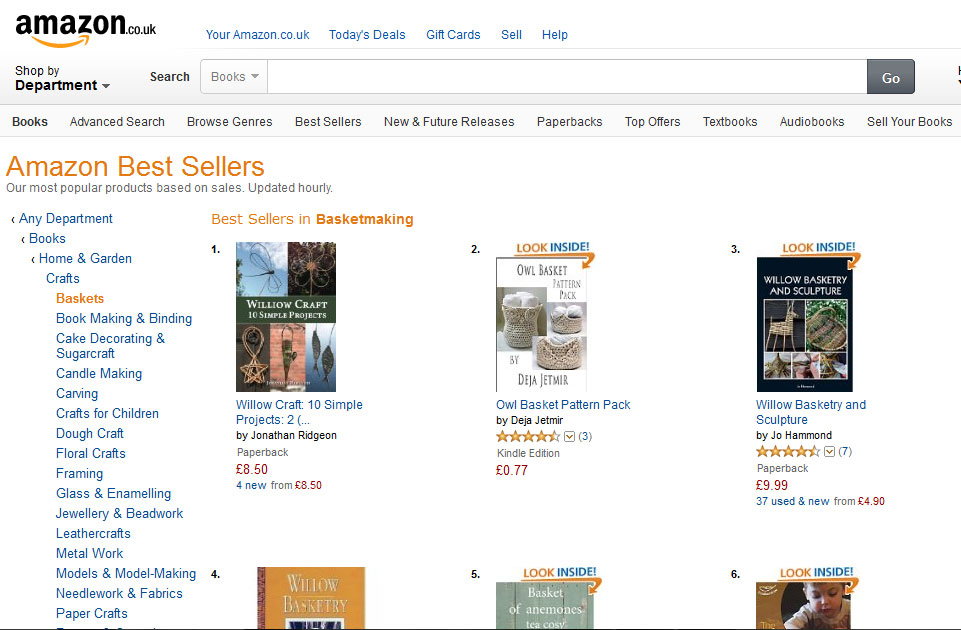
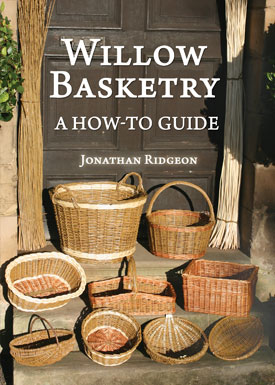
| My latest Book,
titled: Willow Basketry A How-To Guide |
January
2016 |
 |
| |
I have just published my third paperback
book, titled:
Willow Basketry: A How-to Guide. I am very
excited and proud to have finally completed
this.
Brief book description:
Through a series of easy to follow step by step
projects, this book will teach you the
fundamental skills and techniques as used in
many every-day baskets. Clear instructions and
more than 280 photos and diagrams will guide you
through every aspect. Projects include ‘your
first basket’, a simple bowl; a log basket; a
garden trug; a potato basket; and a foraging
basket.
The book is available as a paperback from
Amazon, or as an eBook (at a reduced price) from
my website.For the product page which
includes a full description,
click here
|
|
|
|
|
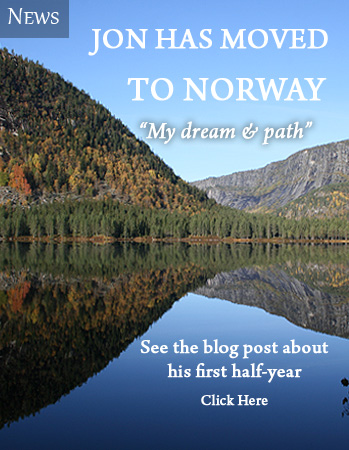
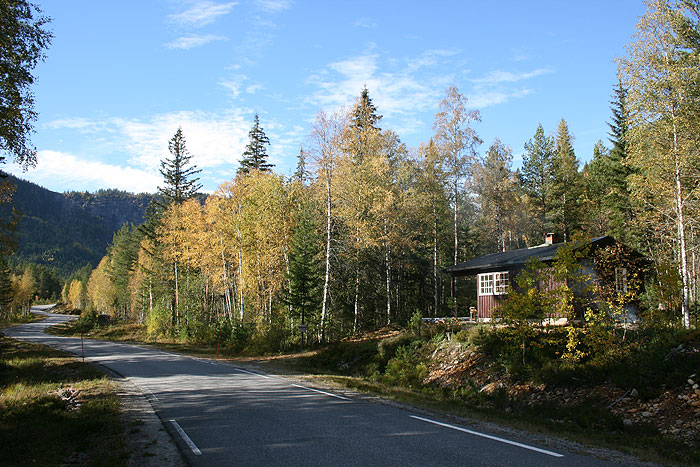
That’s right; I am now a resident of
Norway! Telemark is my home county.
I moved here from the UK last year
(mid 2015). Wow what an adventure!
As much as I love Britain and its
nature, over the past years I began
to feel like a wild bear in a cage;
particularly with there being no
right to roam in England or Wales.
What’s more, for a long time my
dream has been to work towards being
as self-sufficient as possible.
Realistically, I didn’t feel that
this could be achieved in the UK, at
least not without lots of hassle.
And so, for my personal freedom and
sanity, moving to another country
was the logical option in my mind.
Apart from the epic landscape and
freedom, Norway is home to one of my
best friends: Torjus Gaaren of
livingprimitively.com . He is a
true expert in wilderness living
skills. I saw what kind of life he
has, and thought, “I want that
too!”.
Torjus has taught me an incredible
amount of skills, which are needed
for living off this land. For that I
am very thankful. By combining these
things with my existing skills, I
have already made huge steps on my
path towards self-sufficiency.
I could go on for hours about all
the things I have done and made in
the last year. However I would
rather sum things up with the
lessons and realisations which have
been most profound to me; many of
which are actually psychological:
Some realisations &
lessons from my time in Norway so
far:
-
Community and friends are everything!
This is the case in so many
aspects, and is not to be
underestimated.
-
Share what you have without
worry that you won’t receive
back in some way. Giving is
receiving as they say…
-
As expected, self-sufficiency
is not an easy life, but it is a
fulfilling life. I have felt
many times that no matter how
worn-out or uncomfortable I am
(e.g. cold and wet), deep down I
am still happy and feel that I
wouldn’t rather be doing
anything else. There is actually
a lot of happiness to be
found in hardship…
-
In the beginning, if you are not
used to this life, there will
most likely be times which are
very psychologically
challenging. Any weakness in
your mind will be trying to
convince you to give up and
return to the comfortable life…
The trick is to push past
this. It can sometimes take
days, but one day you’ll most
likely wake up and feel
optimistic again. You will be
stronger for going through these
mental tests and your thresholds
will be pushed to higher levels.
-
Hardship makes you stronger.
-
You don’t have a God-given right to
anything.
You have to make your reality...
-
Determination will get you to
where you want to be.
-
In life I have learnt to
Instinctively try to follow my
'path'. In terms of direction
and lessons, I have learnt to
trust in the universe to bring
to me what I need. My experience
in Norway has confirmed this.
-
Living this way of life which is
so in touch with nature makes
you realise how far we have come
from what is natural for us
physically, mentally and
spiritually. All people used
to live off the land a
relatively short time ago; our
modern way of life is a mere
scratch at the end of a
time-line of human existence.
-
It is easy to underestimate how
much food you need to hunt,
gather and grow.
-
Animal parts which most modern people
refuse to eat are actually the
best parts, both in terms of
flavour and nourishment.
I am talking about things like:
liver, kidneys, spleen, brain,
tongue, nose, hooves, bones and
very fatty meat. People are
seriously missing out! In fact,
if you are a hunter-gatherer and
you don’t eat these things, you
will probably die before long.
-
In order to overcome fears,
you have to face them; for
example, believe it or not, I
used to be quite squeamish about
the idea of gutting and
butchering animals. But since
just getting stuck-in, I now
really enjoy the task! To
overcome a fear is incredibly
rewarding!
-
You cannot live off protein and
greens alone, you need plenty of
fat or carbohydrates too (I
choose mostly fat), otherwise
you’ll become ill from protein
poisoning. For example, if you
catch a ton of fish, if they
don’t have a good amount of fat
content, then you can’t survive
off that alone.
|
|
|
| My latest Book &
eBook - Willow Craft 10 Bird Feeder Projects |
February
2015 |
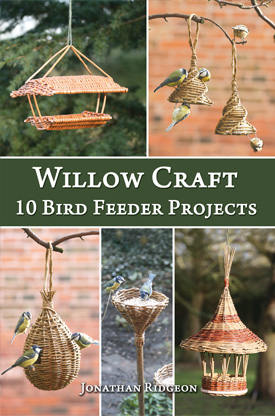 |
| I am very happy and proud to announce the
publishing of my second paperback book! Titled:
Willow Craft 10 Bird Feeder Projects. This
is also available as an eBook (see below). The
paperback book is available for purchase from
online retailer Amazon. See the product page
here:
E-Book version:
(pdf file) is available for £6.50
HERE
on my eBooks page. (Delivery to your email
within 15 minutes)
Book description:
Through
detailed stage by stage instructions, this book
will show you how to make 10 different bird
feeders from willow using classic basketry
techniques.
You do not need any prior basketry experience to
undertake the projects. Everything you need to
know is here, including guidance on tools and
materials.
"As a basket maker and nature enthusiast, I
have had a lot of fun making the projects
presented in this book; as well as the continued
joy of watching the birds feed from them. My aim
in writing this book is for you to experience
the same, and also be inspired with the
basketry; a craft which can be put to so many
uses!" - Jonathan Ridgeon |
|
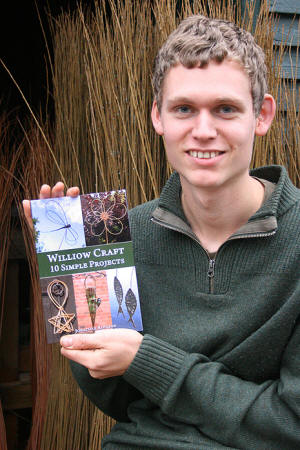
| My First Physical
Book - Willow Craft 10 Simple Projects |
November
2014 |
 |
| |
|
NEWS
UPDATE
Book reached #1
best seller in basket making category on
amazon.co.uk!
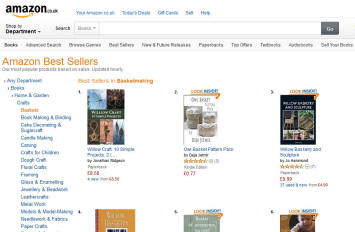 |
|
|
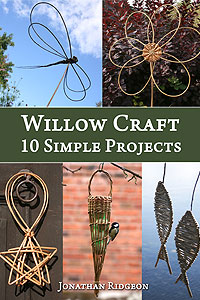 |
I am proud to announce that my book Willow
Craft 10 Simple Projects, (first published
as an eBook), is now published in physical form
and can be purchased as a paperback book from
online retailer Amazon. See the product page
here:
Alternatively, this book is still
available in eBook form and can be bought
from my eBook page HERE.
(Delivery to your email within 15 minutes)
Book description:
This eBook will show you how to make some of the
most popular and inspiring willow craft projects
other than baskets. There are items for both the
home and garden, and all are great fun to make.
You do not need any previous experience, the
detailed instructions have been designed to
guide you every step of the way.
Packed with colour
photographs and diagrams showing clearly how to
complete every stage. |
|
|
|
|
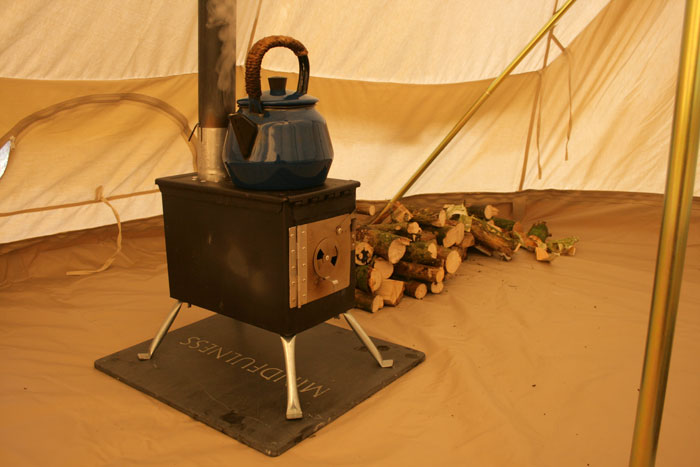
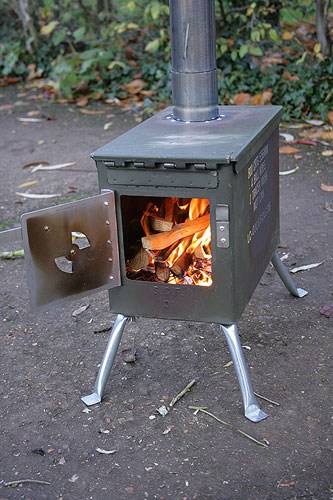
New How-To Article Added - Making an
Ammo Can Stove |
| |
|
|
|
I have made this portable stove as a source of heating for
inside my canvas bell tent, it should be ideal for winter
camping when temperatures drop below zero. Also, I just thought
it would be a fun thing to make... People have made such
stoves in many different ways. They are mostly used in colder
climates like Canada and Scandinavia. The following article
shows my own design, bear in mind that this is the first stove I
have ever made, I am not an expert where stove use and design is
concerned so the design may not necessarily be the best.
To see my full step by step instructions on
how I made this stove
click here |
|
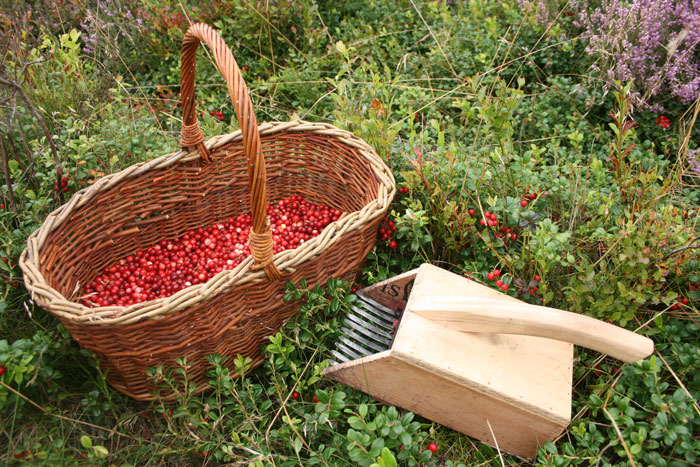
New Article Added - Making a Berry
Picker |
| |
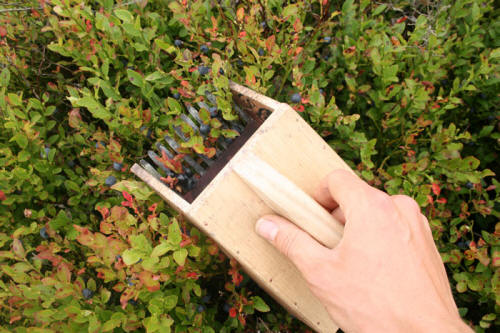 |
I have updated an old
article showing how to make another
design of berry picker; the 'berry
scoop'/ 'berry comb'.
They
are excellent for picking berries such
as Bilberries and Cowberries. Both
designs have multiple prongs like a
comb, the picker is used by pushing the
comb through the foliage of the berry
bushes, the fruit which is too large to
pass between the prongs gets plucked
free. Many berries can be picked at once
and the picker is frequently emptied
into your foraging basket. With a good
berry picker you can potentially pick
huge quantities in just 1 day! |
|
| |
 |
|
 |
|
| |
Cowberry Harvest -
Late summer at Cannock Chase park north
of Birmingham |
|
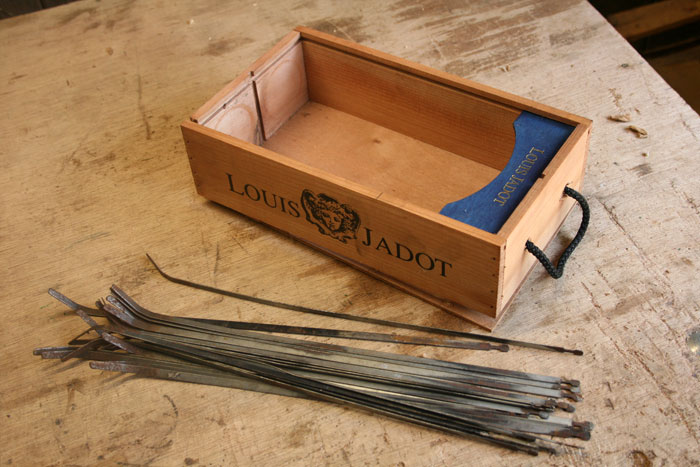
Materials used - small
wine crate and broken garden rake |
|
| |
|
|
|
|
|
For this
project I recycled some items I had lying about;
a mini wine crate and some tines from a broken
garden rake. You could of course use other
materials, some plywood off-cuts would be
perfect for the box, and for the prongs you'll
need to be a bit inventive, there are some
suggestions of other materials in the article.
To see my full step by step instructions
on how I made this berry picker
click
here |
 |
|
|
|
|
|