 |
|||||||||
|
|||||||||
| For a more up to date version of this article click HERE (Over the years my basketry skill has improved and I now share my new skills, experiences and better weaving techniques in my latest basketry article, However this page may still hold a lot of interest due to selection and preparation of Brambles as a main basketry material.)
Weaving a basic basket
|
|||||||||
| For this basket I am using Bramble stems as my weaving
material. A lot of you may have access to more brambles than Willow or
other materials. Also I have found Brambles to be an excellent weaving
material for many reasons: they dry fast, very flexible, nice colour,
strong, long stems, and they have quite an even thickness throughout their
length. Also I have worked a lot with bramble stems without even soaking
them before I weave them which saves a lot of time. If you are using Willow or Brambles then you need to dry them. (Failing to dry them will result in the weaving material shrinking and the basket will become loose and poor quality.) You can tell when they are becoming dry because they feel lighter and the bark goes wrinkly. There are only certain types of Willow that are good for weaving and they need to be collected in the winter if possible, when the sap levels are low and the shoots are free of leaves. Once you have your materials you will need to soak them in water to make them more flexible. Willow may take longer to soak and become supple, it could take several days. You may be wondering how to remove all those bramble thorns and make the stems comfortable to weave.... when I first collected brambles I ruined a good pair of leather gloves, I have found that it is best to wear leather gloves but also hold a piece of canvas or tough material over the top. Hold onto the growing tip of each bramble, run your other hand (protected by leather and fabric) all the way down the stem, then cut it off at the base. This should roughly take off all the thorns and leaves but the stems will still be very rough. Leave your brambles to dry fully and then pull them through some sand paper held in your clenched hand, this will make the stems very nice and smooth and not a problem to work with. the construction of this basket is identical whether you are using willow, brambles or other materials. |
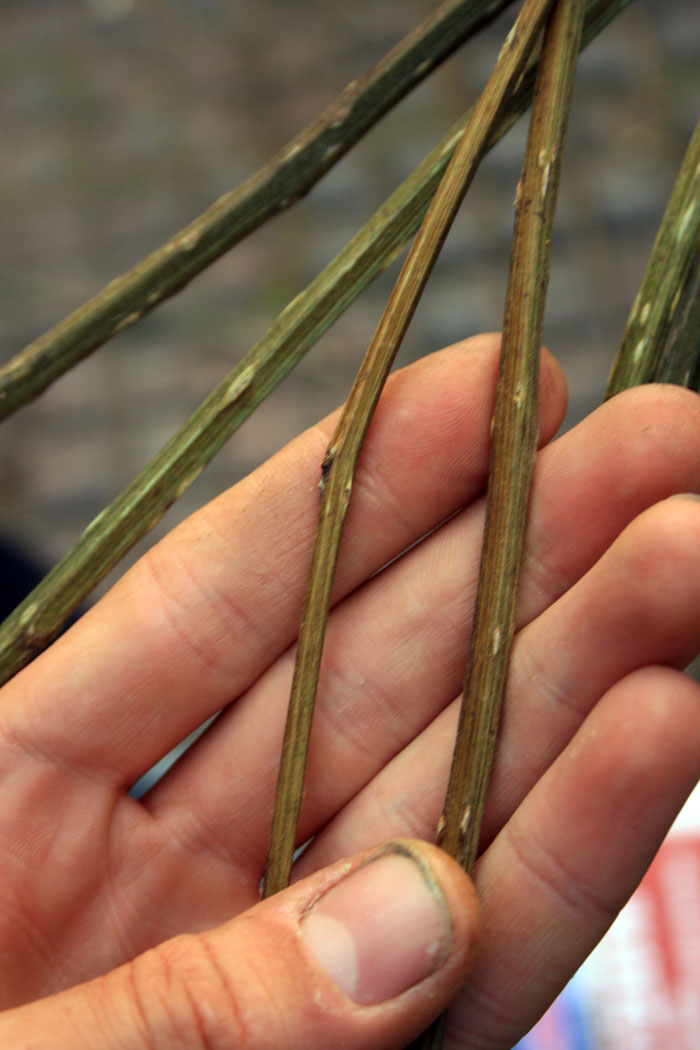
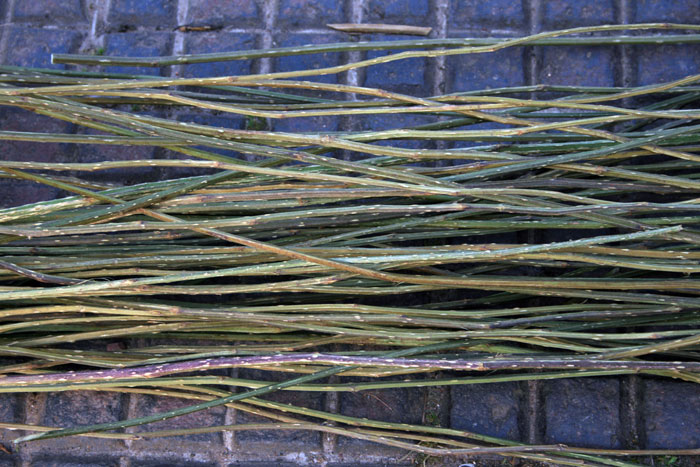 Choose your brambles wisely. Don't go collecting brambles that are too thick or too short to work with and look for the longest stems. |
||||||||
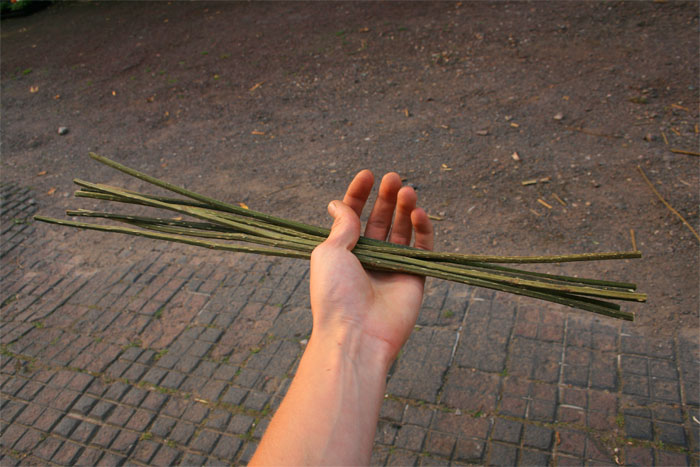
| Cut 8 sections of slightly thicker material. These pieces
form the bare skeleton around which we will be weaving. We call these
pieces the 'stakes' , 'warp' or 'spokes'
The material which we weave around the stakes are called the 'weaves' or the 'weft' |
 |
||||||||
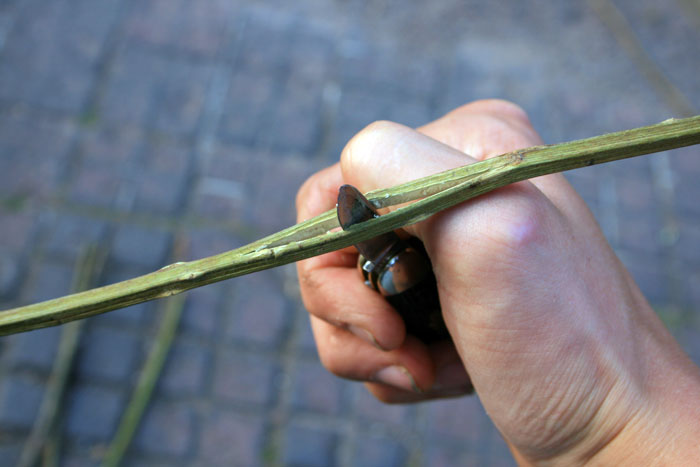
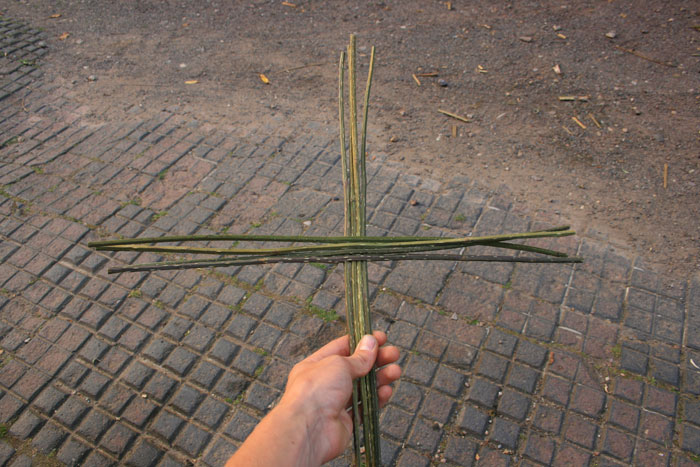
| Make an opening at the centre of four of the pieces with your knife. |
 |
||||||||
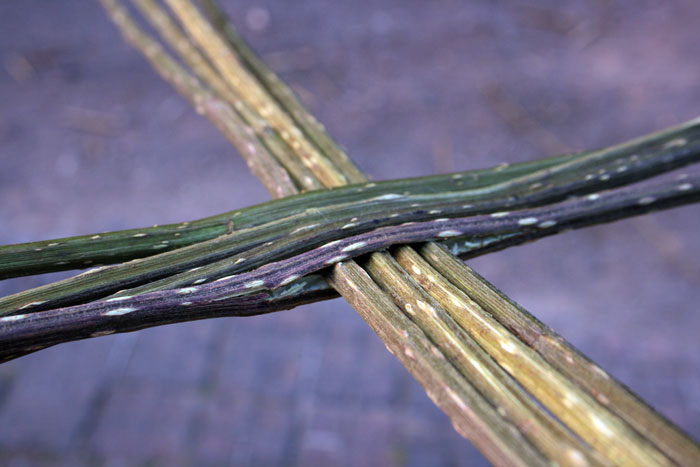
| Insert the non-split pieces into the split pieces to form a cross |
 |
||||||||
 |
|||||||||
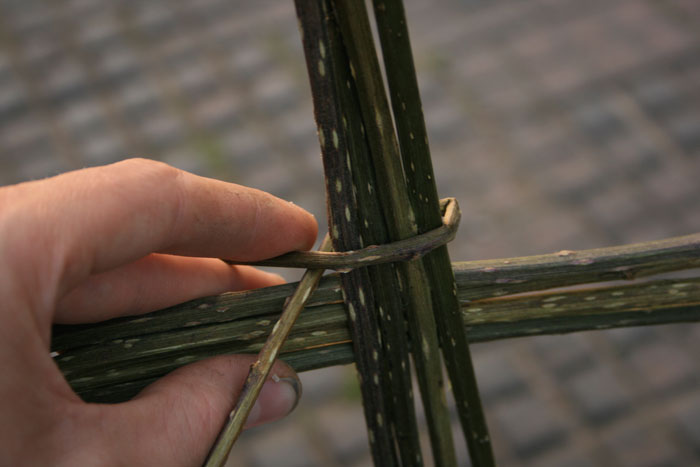
| Take a long thinner piece of material and fold it in the centre around one side of the cross. |
 |
||||||||
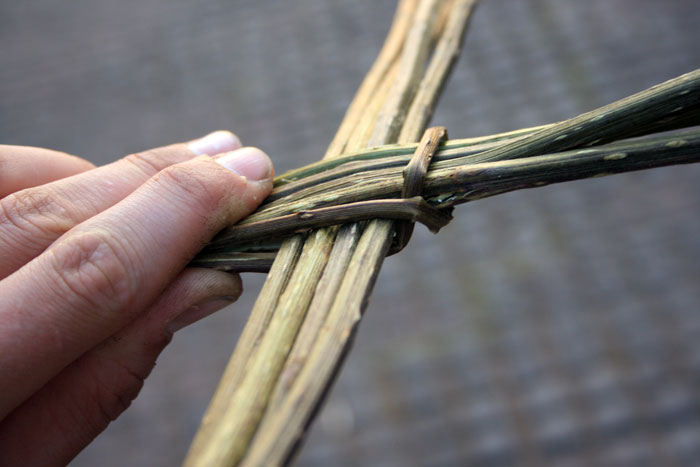
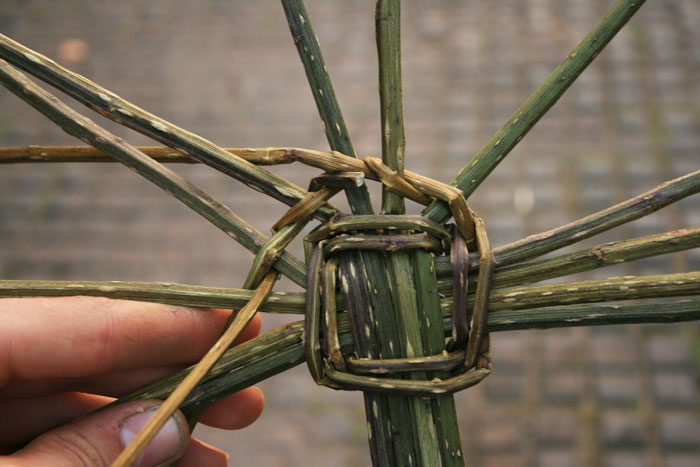
| The weaving technique that we will be using is called
'Twining'.
When we 'twine' around the base we twist the two weavers half way around so that we are bringing the bottom weaver to the top and sending the top weaver to the bottom. This should be done in the same direction each time. |
 |
||||||||
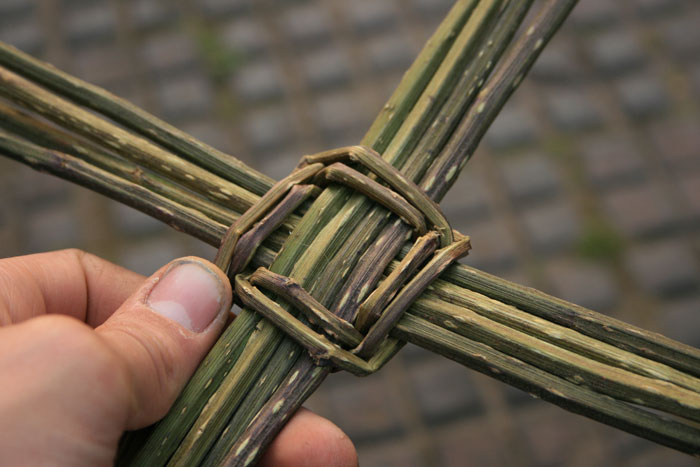
| Work your way around the base, going around each set of 4 stakes. |
 |
||||||||
| You can see here how the bottom is brought up over the top and visa Vera. |
 |
||||||||
| Try to make a tight weave and the staves will be held together firmly. |
 |
||||||||
| weave around the stakes twice |
 |
||||||||
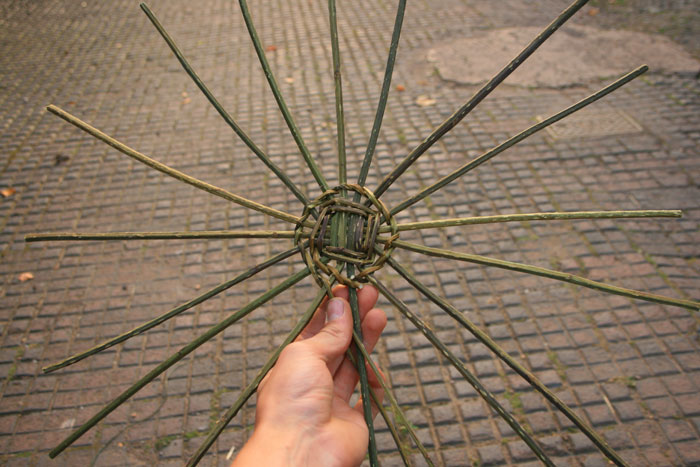
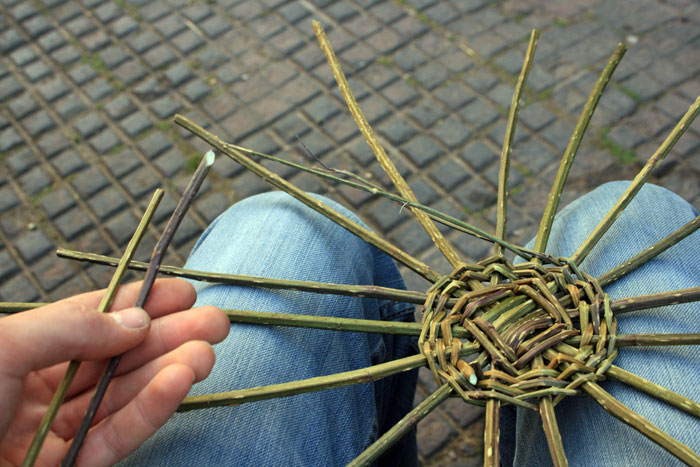
| Now open each stake out and and weave around them individually to form an even spoke structure. |
 |
||||||||
| At this point my weavers were not an even thickness and I wanted to add in a thicker weaver to replace the thin one so that the weave is equal. Sometimes when the weavers are not an even thickness the thicker one tends to want to stay straight and the thinner one does all the bending. |
 |
||||||||
| A bit further on in the tutorial you will be shown how to add in new weavers. It's easy... |
 |
||||||||
| Once you get a rhythm going you can make good progress. Often at the start of a basket you may think that it looks really messy but if you keep twining the chances are that it will look ok after a few more rows. |
 |
||||||||
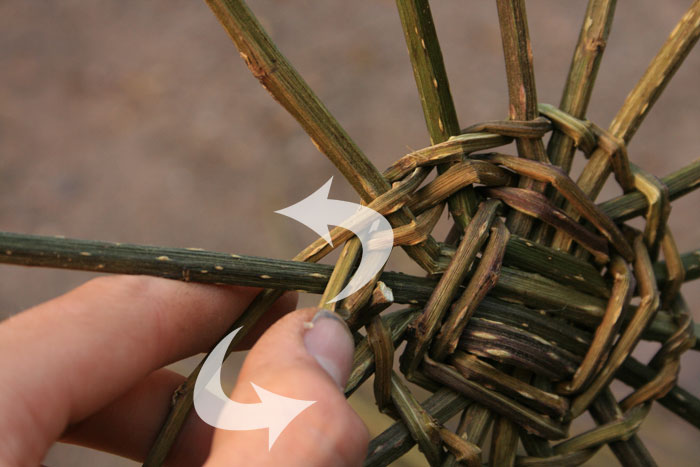
| Remember... Bend the top weaver over the front of the the other weaver, and the back weaver up behind the top weaver so that they swap places. Repeat the process around each stake. |
 |
||||||||
| You can see here that I have come to the end of both of my weavers. |
 |
||||||||
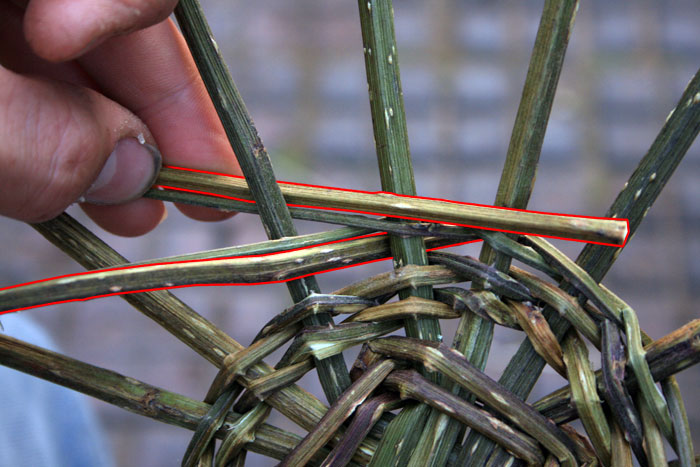
| To add more weavers in you just lay the new ones by the
side of the old. The ends will stick out of the front and back and we will
trim these off later.
To make things easier to understand I have highlighted the new weavers with a red outline. Now just continue weaving the new weavers just as you did before. |
 |
||||||||
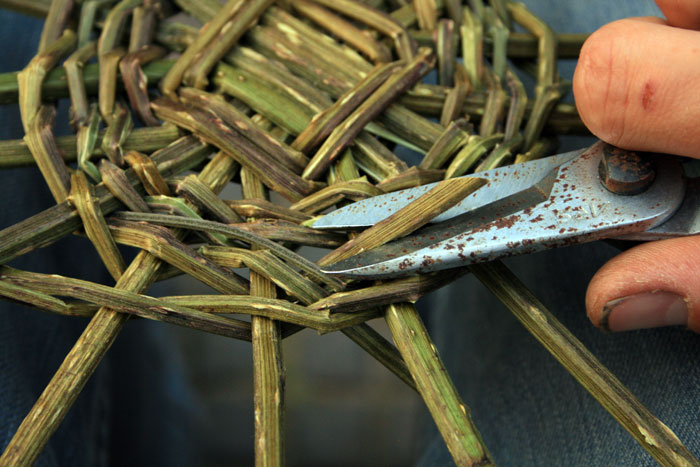
| Cut the ends of the new and old weavers off after you have
woven around the basket again. You should cut the ends of the weavers so that the new end is resting against a stake. |
 |
||||||||
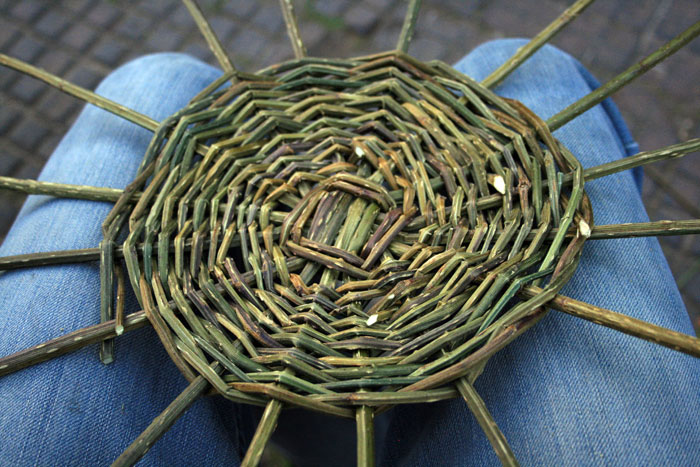
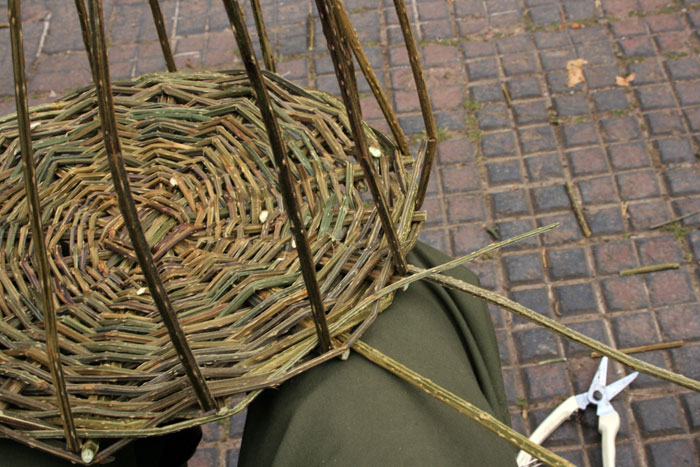
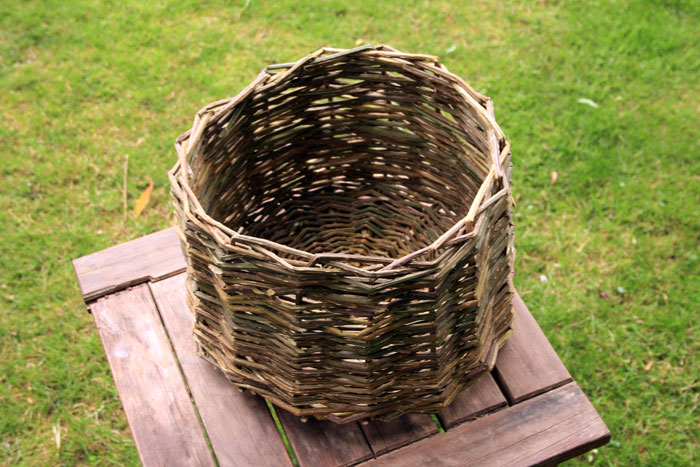
| Make your weave compact and even. |
 |
||||||||
| When you feel that you have woven a base big enough it is time to start weaving the sides. The base of my basket is about 13 inches wide. |
 |
||||||||
| The length of the stakes is not long enough at this stage to carry on and complete the basket so you have to insert new stakes down into the weave next to the old stakes. Just push them in, make the end of the new stakes into a point and it will help you to push them in easier. |
 |
||||||||
 |
|||||||||
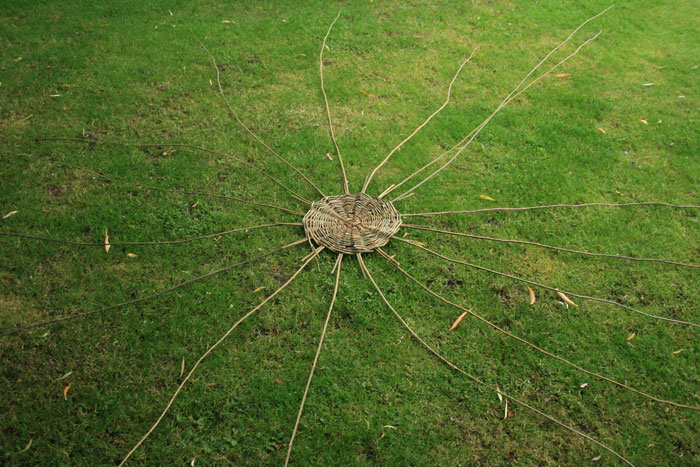
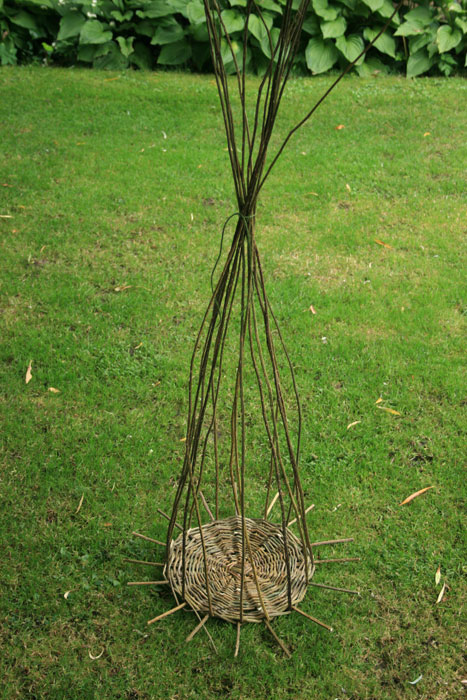
| Now bend up the long stakes at the edge of the woven base and tie them together at the top to hold them in an upright position. |
 |
||||||||
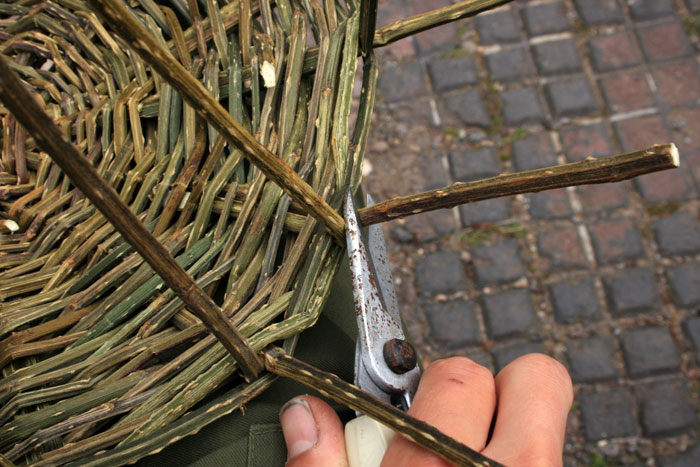
| You can weave the short stakes into the walls of the basket or just cut them off like I did. |
 |
||||||||
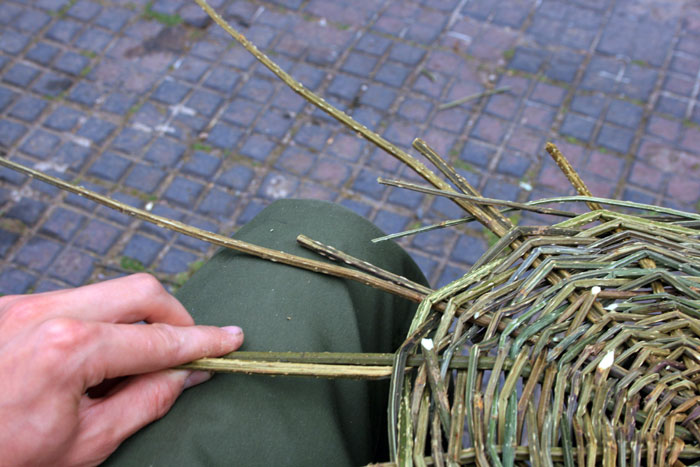
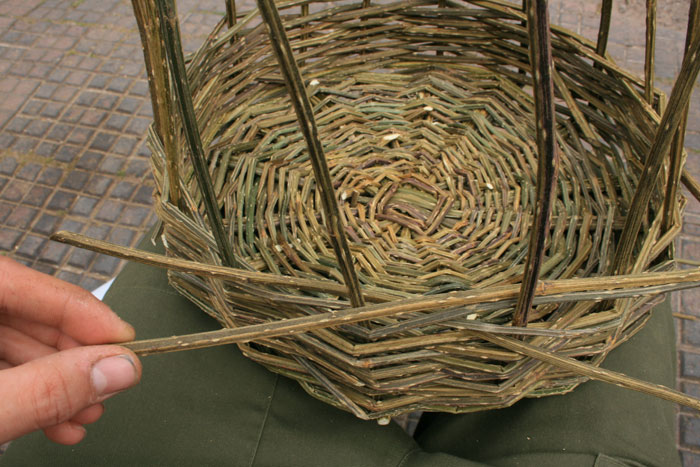
| To begin twining the sides of the basket you can insert two weavers into the base just like you did with the stakes. |
 |
||||||||
| Now bend these new weavers to the right and begin weaving around the sides. |
 |
||||||||
| You will notice that it is much easier twining around the sides. Simply lift the outer weaver up and behind the next vertical stake as illustrated in the picture. Now repeat the same move with the other weaver. keep repeating this weave around the basket and the sides will build up. |
 |
||||||||
| When You have woven a few inches up the sides you can undo the string that is holding the stakes together at the top because the weaving that you have done so far will hold the stakes up vertically by itself. Removing the string will enable you to pass the weavers between the stakes more easily. You can also cut the stakes down a little at the top to stop them tangling together. |
 |
||||||||
| This picture shows how new weavers are added in. Its just like what you do for the base. |
 |
||||||||
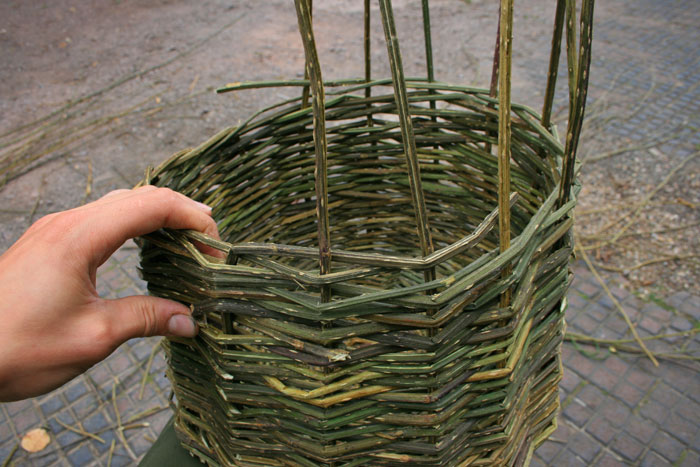
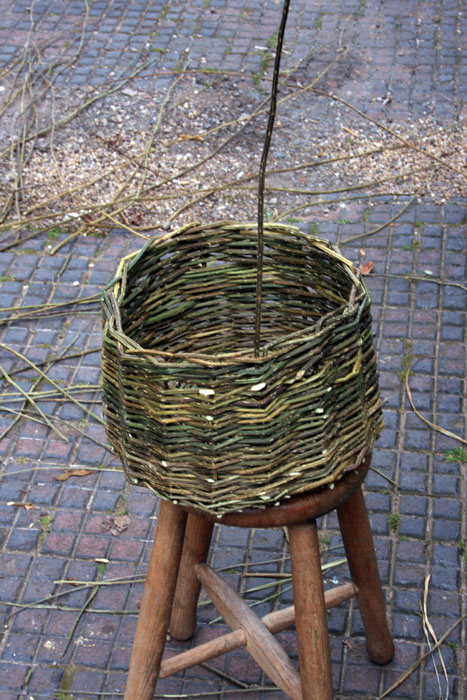
| As you weave it is a good idea to compress the weave by
pushing it down around the stakes to eliminate any movement in the weave,
this will give you a stronger basket. When you have woven the sides to the desired height it is time to finish off the top by weaving a proper rim. To do this, take each stake one by one and bend it to the right behind one stake, in front of the next and then let it rest behind the third. Cut off the excess. Click on the picture to take a closer look. |
 |
||||||||
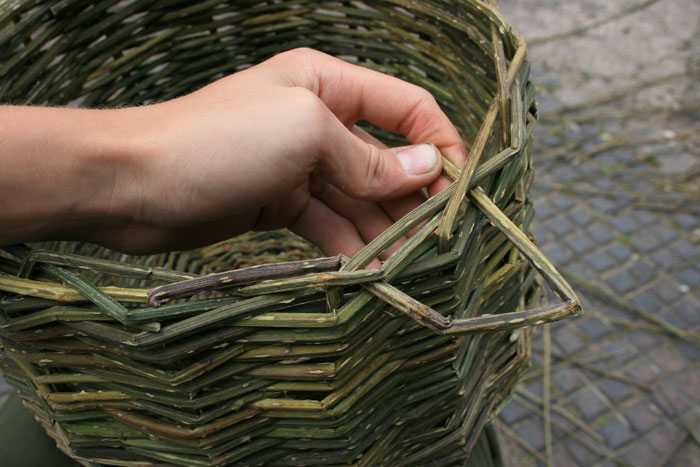
| Work around the rim doing one stake at a time. The last few will be tricky because there will be not enough upright stakes left so you will have to take the ends and thread them through the rim to gain the same pattern. |
 |
||||||||
| Finished rim... |
 |
||||||||
| If you like you can call your basket finished or you can add handles. |
 |
||||||||
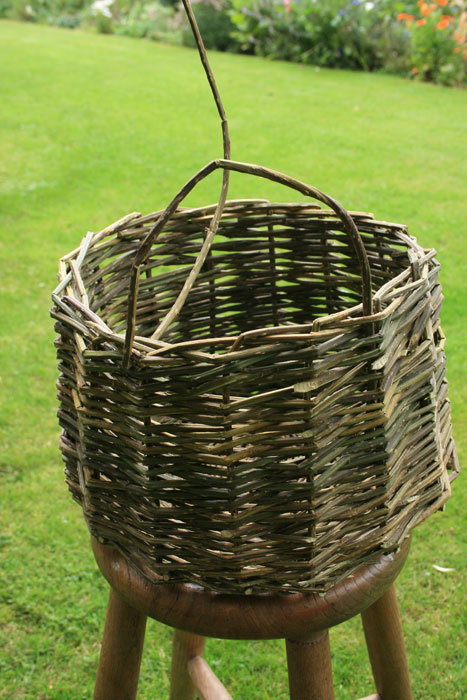
| On my basket a added a small handle on either side but if
you prefer, you can make one big handle that stretches from one side to
the other. The method is the same for both options. To start the handle, take one shoot of weaving material and push it down into the weave through the rim. |
 |
||||||||
| Now bend it over and insert it through the side of the basket so that it goes underneath a couple of weavers. |
 |
||||||||
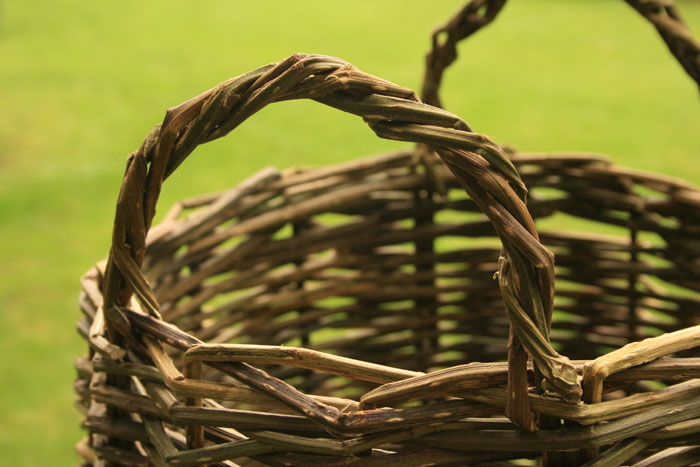
| Then take the end and wrap it around and around the single arc shape you previously made, then when you get to the other side just insert it down into the weave exactly where you started the handle. |
 |
||||||||
| Now repeat this again but from the other direction so that the handle is four pieces thick. |
 |
||||||||
| Try to wrap the shoots together evenly so that it looks
like it is naturally twisting. It can be a tricky thing to do sometimes. Now add a handle on the other side in the exact same way. |
 |
||||||||
| Finished basket... |
 |
||||||||
|
|||||||||