|
Click here for the
completed article
Canoe Build-along
My Third Skin on Frame Canadian Style Canoe...
The following story will be updated as and when I complete
new stages...
After all the fun and enjoyment I've had out of my last two
skin on frame canoes, I have decided to build another one, this
time it will be a two man canoe in the same Canadian style that
I like so much. There are no plans for the canoe I am building,
all I know is that I want it to be around 4.5 meters long and
about 90cm wide at the centre Most of the jobs will just be done
by eye.
This is not a canoe made from 100% wild materials like a
birch bark canoe, but a mix of traditional wood working skills,
some cotton canvas and even a few wood screws. The emphasis for
me is always on doing a proper job, speed is not the essence. I
am always reluctant to use power tools as I feel mistakes can be
made quickly with such hasty devices. Hand tools fit better with
my calm and patient nature anyway. |
| |
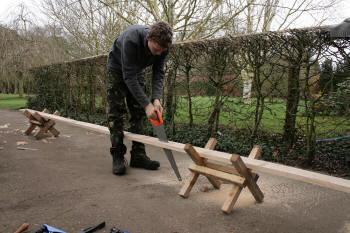 |
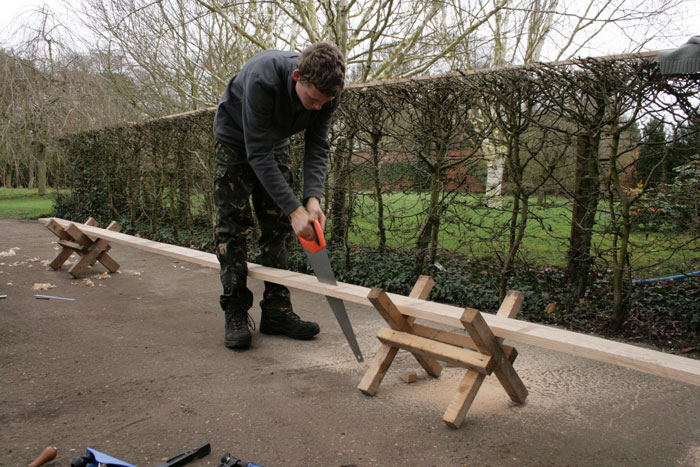
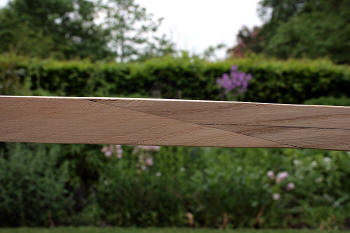
| To start I've purchased a plank of naturally air
dried Ash wood from the timber yard about 7" x 1" x 5m.
At first I wanted to use a long sapling from the woods
to fashion my Gunnels from but I was unable to locate
one straight and long enough for my needs. By purchasing
the plank I would also have enough wood for many other
parts too such as the long keel baton etc. The wood
didn't come cheap though... about £90 for this one
plank! The first job was to rip cut along the length
to cut off two laths suitable for Gunnels. This job
could be done with a circular saw but I am quite
stubborn and don't like to use power tools all that much
:-)
|
|
 |
| |
 |
|
 |
|
| |
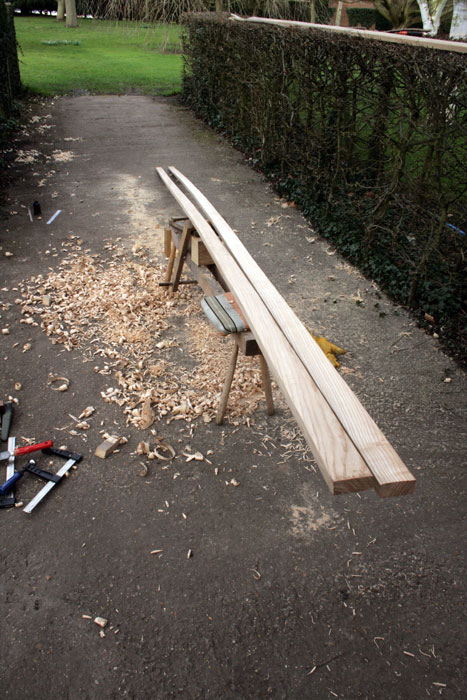
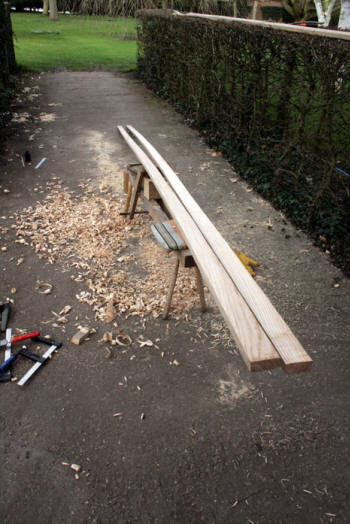
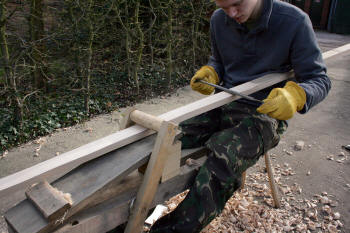
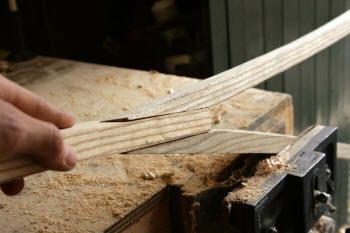
Using a Shave horse and Draw Kinfe I then worked
the two gunnels down to final dimensions which is about 20mm x
55mm. I then made a gradual taper towards the ends shaving it
down to about 3cm high with no change to the width.
|
|
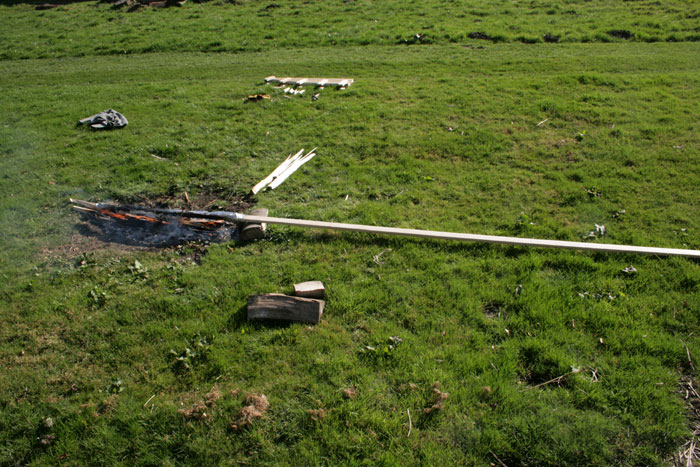
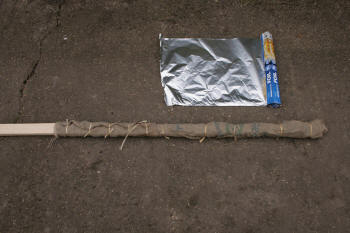
Now it was time to steam bent these tapered
ends upwards which will give my canoe some nice curves (known as
Indian ends). I am using quite a simple but effective method to
steam the wood. Firstly I wrap the wood in Hessian material,
then give it a good soaking and finally wrap it up in tin foil.
Then I cook the wood over the fire like a fish. The wood doesn't
burn if the material is wet enough.
|
|
| |
|
|
|
|
| |
 |
 |
|
| |
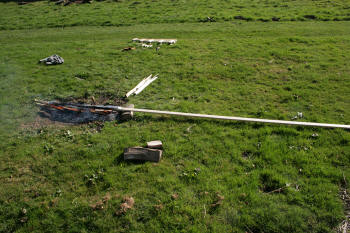
Here you can see the wood propped up over a
long fire. As a general rule wood needs steaming for an hour per
inch of thickness. My wood was only 20mm thick but I steamed it
for 1 and a half hours for good measure.
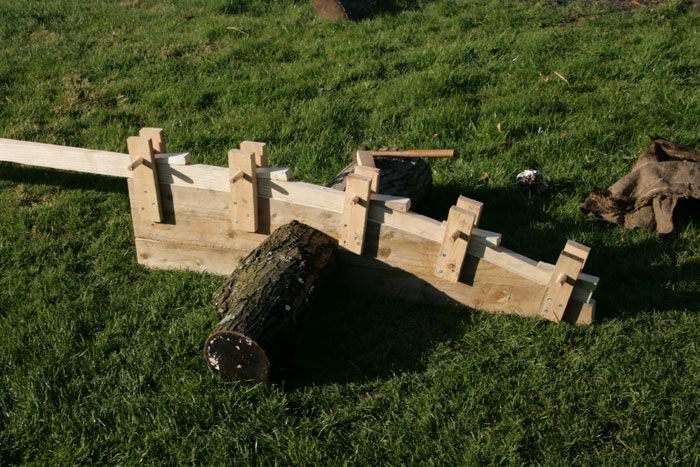
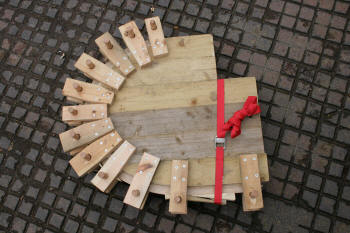
Here you can see the
form I have made to clamp the Gunnel ends into the desired
shape. (you also have to allow for the wood to relax a little,
so make the form curve more extreme) The clamp works by first
inserting a dowel peg above the wood and then tapping a wedge
between the wood and the peg to securely hold the wood in shape.
The wood then needs to be kept in the clamp for several days to
let it dry and take it's new shape properly. You can see that
with four Gunnel ends to steam bend this process takes
considerable time! Having two forms would speed things up.
|
 |
|
| |
|
|
|
| |
 |
|
 |
|
| |
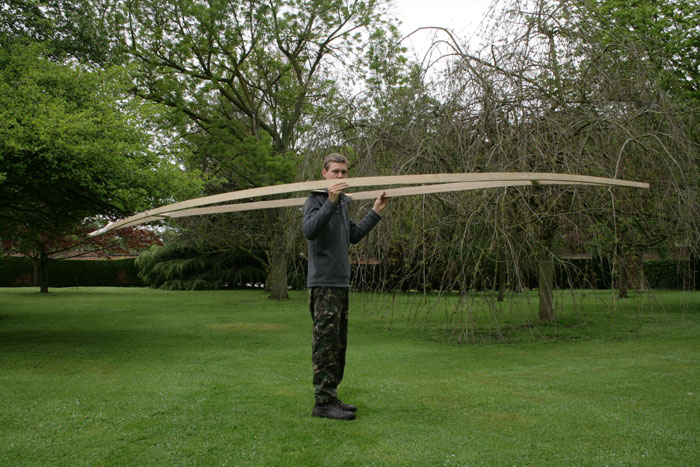
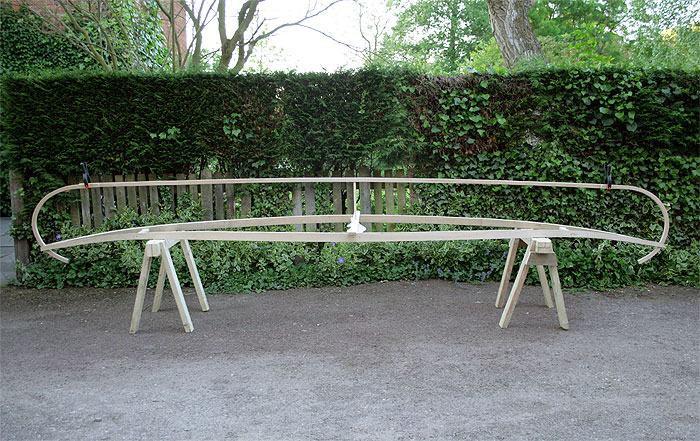
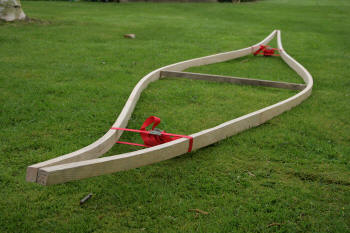
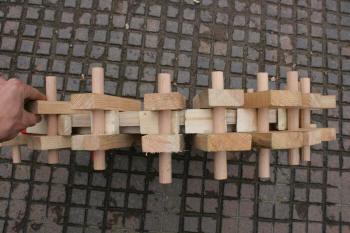
Using some cam straps and a scrap piece of
wood, the first curves of the canoe can be seen... It's key
stages like this that spur you on to do the next job...
|
|
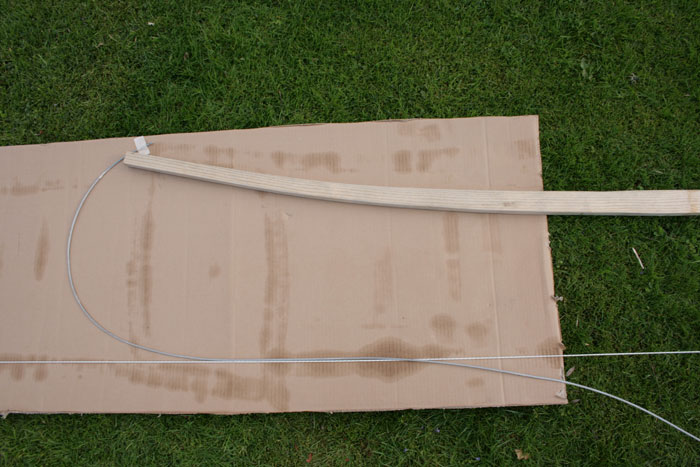
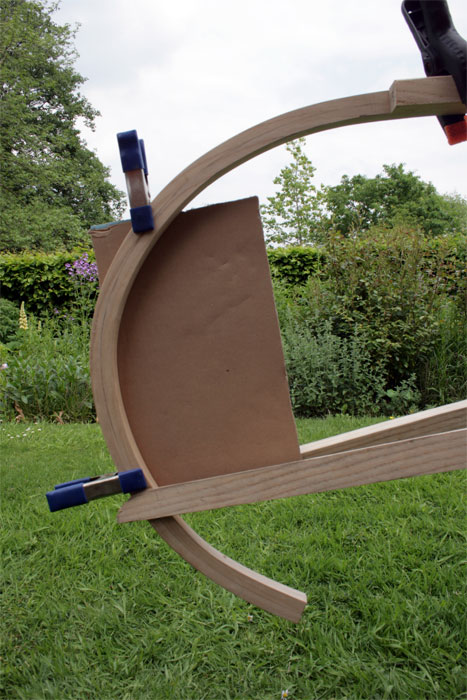
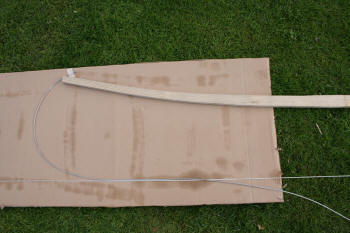
Before fixing the gunnels together with proper
cross members (called 'thwarts') I wanted to gauge what shape
stem pieces I would like for the ends of my canoe. I did this by
lying a Gunnel on the lawn with a piece of cardboard under it. I
measured out the intended final depth of the canoe and marked it
with a line of cord. Then using a metal cable I could make
various curves to envisage what I would like the end of the
canoe to look like. I then drew around the cable onto the
cardboard, I'll use this shape as a template later on when I
make another form to steam bend the stem pieces into shape.
|
|
| |
 |
 |
|
| |
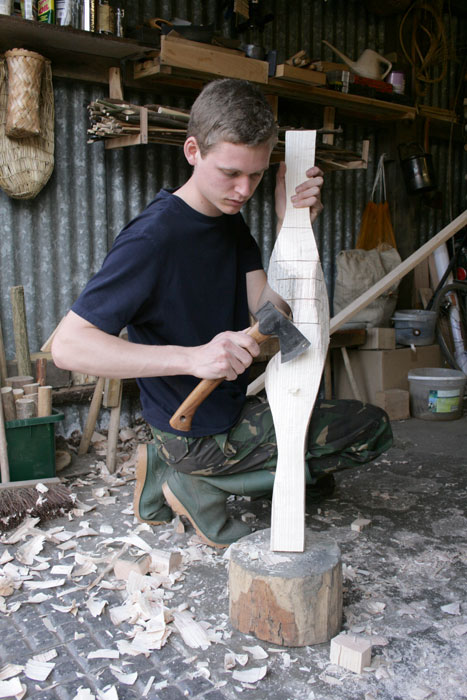
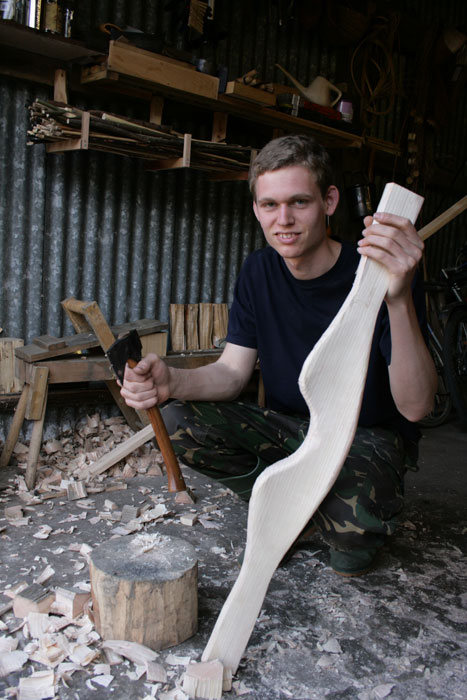
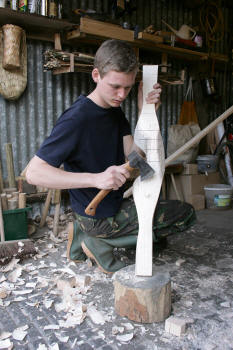
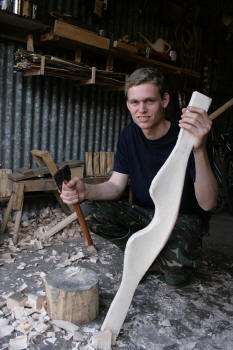
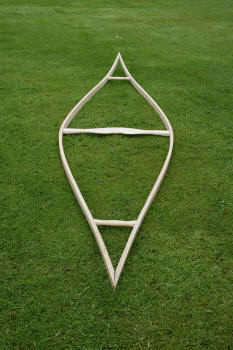
Here I am carving the 'Yoke' which is a type
of central thwart used for carrying the canoe on your shoulders.
(If you can remember, a very similar type of yoke was used in
the old days for carrying two buckets of water on the
shoulders.) |
|
| |
| |
 |
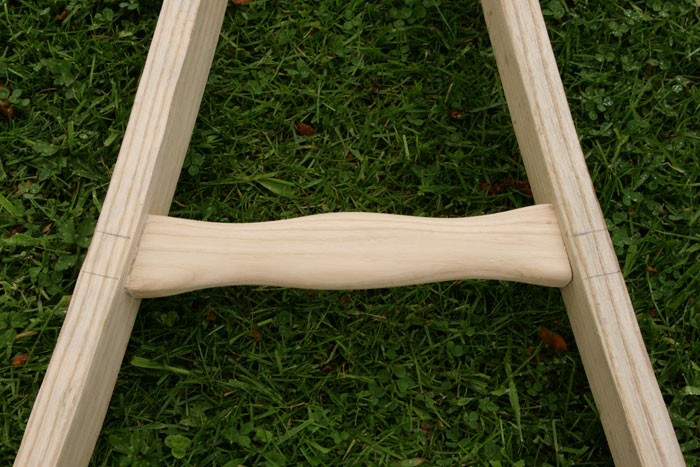
| I made two smaller thwarts to be installed near to
the ends. A draw knife, rasp, file and cabinet scraper
are the key tools for making such pieces. I have simply
screwed these in place with rust proof screws
The yoke
is also fixed in place at dead centre for perfect
balance. |
|
|
 |
|
|
 |
|
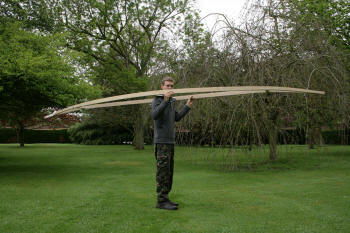
The yoke in action
|
|
| |
 |
|
 |
|
| |
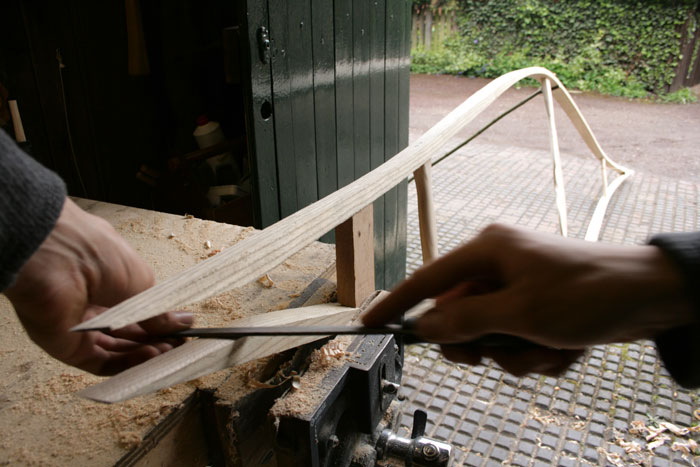
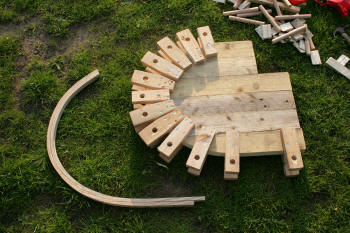
The ends of the gunnels needed to be shaped to
they are ready for receiving the stem pieces. I know that my
stem configuration will be 2cm thick so I can use a scrap block
of wood to test the fit and get the angles correct for now. I
used another temporary piece of wood to wedge open the gunnels
so that I have room to work on the joint with tools like a rasp.
|
|
Constantly testing the fit until complete...
|
|
| |
 |
|
 |
|
| |
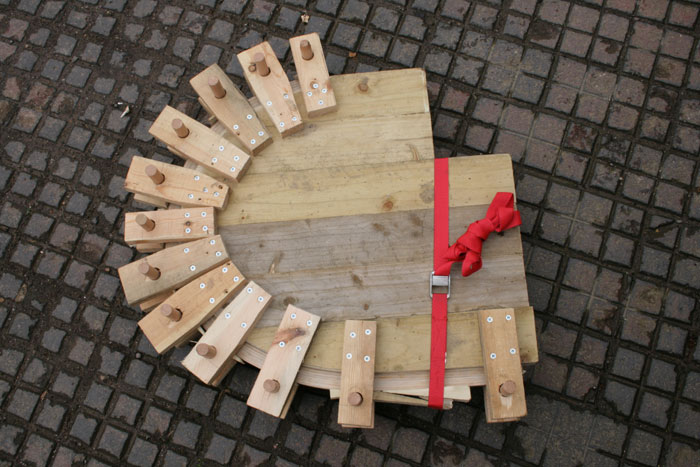
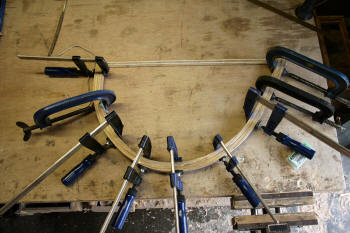
Now it was time for making the stem pieces...
I made this form using the cardboard template I made earlier as
a guide. I had to make the curve more extreme as the wood
relaxes by a few inches when it is released from the form.
Making such a form take a lot of time in itself... |
|
On my first attempt the wood snapped so I
decided to make each stem piece from a lamination of two pieces
of wood instead. (i want the final stems to be 20mm wide by 1
inch thick. I am using Ash wood pieces 106cm long) Thinner
pieces of wood bend much more easily and are far less likely to
fracture. You can see here the two pieces have been bent
successfully and removed from the form after a few days. |
|
| |
|
|
|
|
| |
 |
|
 |
|
| |
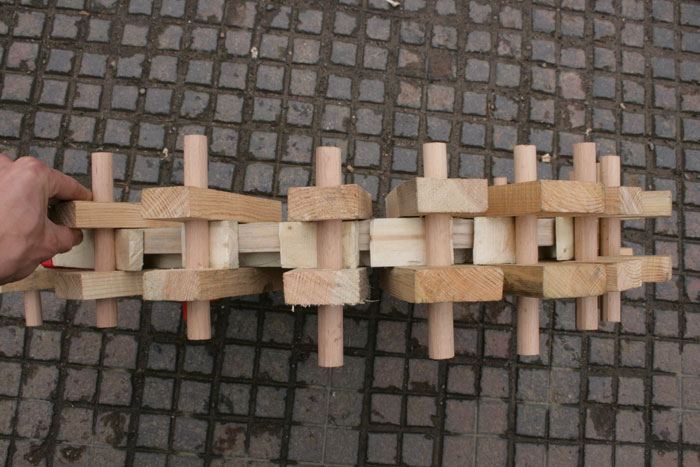
From this picture you can see how dowel pegs
and wedges work to hold the wood in place. The wood was steamed
once again in soaked Hessian and tin foil over the fire. Once
taken off the fire you have to work swiftly to get the wood bent
into shape before it cools down too much. |
|
The two halves now needed to be glued
together, I used an epoxy resin branded 'Bob Smith'. The wood
had relaxed a little more than I had wanted so I tied the two
ends together bringing the wood into shape (I tied the cord in
place through two holes drilled through spare wood at the ends).
Clamps ensure the glue takes a good tight bond.
Now I needed to repeat the whole procedure to make the second
stem piece. |
|
| |
|
|
|
|
| |
 |
|
 |
|
| |
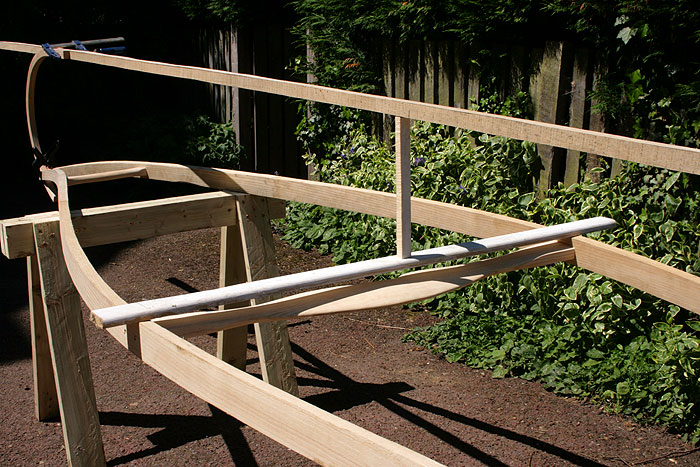
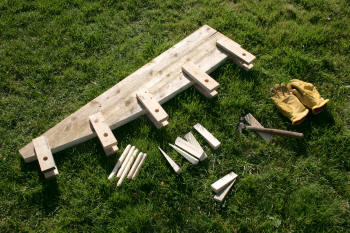
With the stems made I sawed another length of
wood off my plank for the keel baton, I also like to plane and
smooth off all the parts, the baton dimensions are 20mm x 25mm x
however long. I could now clamp the parts together to get an
impression of the shape. |
|
I want the canoe to be about 14 inches deep at
the centre, I made this T shaped prop to temporarily hold up the
keel baton to the right height at the centre whilst I work out
measurements etc for the next stages. |
|
| |
 |
|
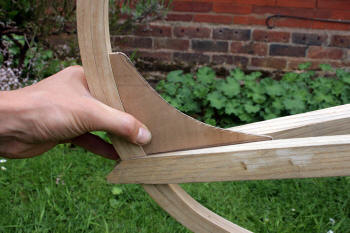 |
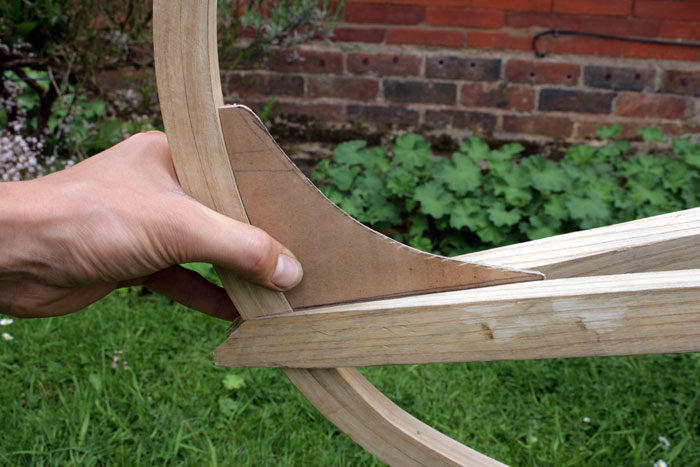
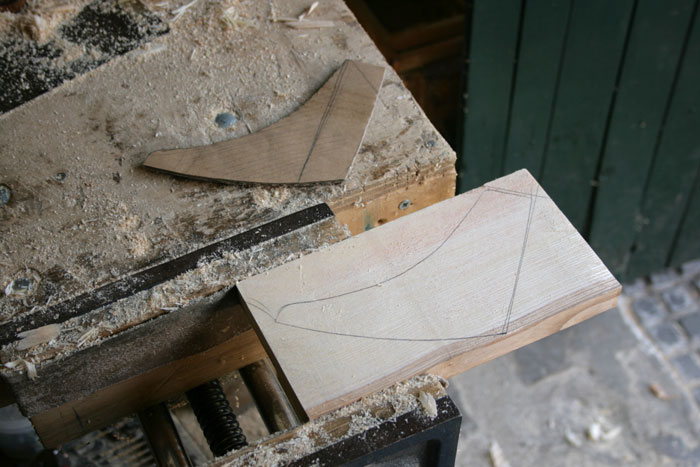
| With everything clamped in place I
needed to make a couple of brackets which allow me to
securely join the stems to the gunnels. To work out the
shape of these brackets I made a cardboard template. I
held the cardboard in place between the gunnel and the
stem, I could then draw the profile of the stem against
the card and cut the template out acordingly. You can
see the complete shape above |
|
|
| |
|
|
|
|
| |
 |
|
 |
|
| |
I transferred the shape to some
wood I had split and shaved out of a log and cut it to shape
with a hatchet, saw and rasp. |
|
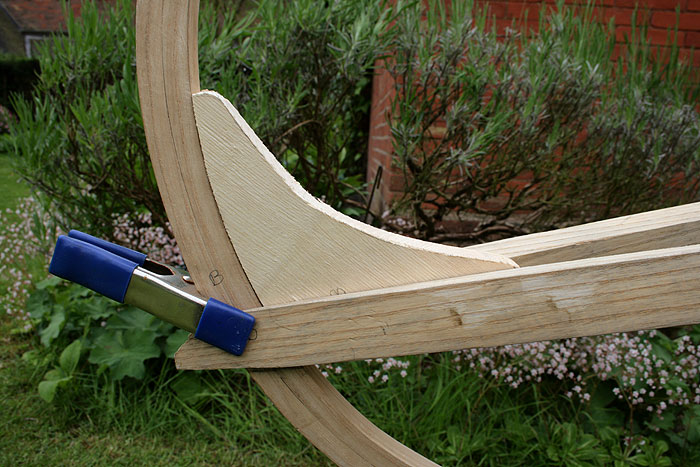
You can see here how this bracket is going to
make a strong connection between the stem and gunnels. |
|
| |
|
|
|
| |
|
|
|
| |
 |
Before permanently securing all these parts together I
joined the stems and keel baton together first with a simple
splice join. I used epoxy glue and clamps. I smooth off any
joins so they are as seamless as possible using a plane, rasp
and cabinet scraper. |
|
Click here for the completed
article
|